Thursday, August 28, 2014

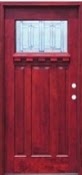
How Do I Replace an Exterior Door?

From design to functionality, here are many reasons to replace an exterior door. While possible to do this task alone, a two or more person group is suggested to share the workload.

Selecting the New Door


1. Measure the area for the new door. Some minor adjustments can be made during installation if needed.
2. Any interior or exterior trim surrounding this exterior door will need to be removed. Caution is advised if the trim will be reused after installation.

Removing the Existing Door


1. Remove the hinge pins using a mallet and screwdriver or the hinges completely to separate the door from the frame.
2. After taking out the door, remove any fasteners attaching the sill or jamb to the door frame.
3.Completely remove the door frame from the house frame and clear any items used during its installation. Shims, wedges used to increase stability, and arrant nails or screws need to be removed or cut down safely. Insulation may be removed to make space as needed.

Installing the New Door


1.Check the opening for rotted wood or other issues that need to be addressed. If the new door sill is not at the same height as the previous, build up the area using weather resistant materials.
2.Insert the door frame into the house frame. Use shims for necessary adjustments to the angles of the frame. Ensure that the door frame is completely level.
3. If the door is not already attached to the frame, attach the hinges to both frame and door, line up the openings, and insert the hinge pins.
4. Check that the door opens and closes as desired. Make necessary adjustments if the door frame is not level.
5. Insert installation into the areas surrounding the door frame.
6. Apply caulk at any opening to weatherize the new installation
7. Install interior and exterior trim.

The benefits of a newly installed exterior range for a more pleasing aesthetic to a better barrier against the elements. Proper installation will lead to fewer issues in the future and lengthen time before needing replacement.

Tuesday, August 26, 2014

Fireplace Decor

Fireplaces just add a touch of class and elegance to any home. Aside from its aesthetic value, fireplaces also are a great source of heat during those long and cold winters. Whether electric or fuel, there are a variety of fireplaces to choose from.
For customers who want to save money on their gas bill while incorporating a sense of style to any room or space, fuel fireplaces are a great option. Gel fuel fireplaces are offered in 26 different varieties and are very affordable, with prices ranging from 149 to just under 500 dollars. The Cantie Portable Indoor/Outdoor Fireplace offers customers the best of both worlds, from lounging on the porch during brisk fall evenings to relaxing in the living room while sipping on hot coffee. The rectangular-shaped design that encloses three fire pits will add interest to any living space. Another example of unique fireplace decor is the Walsenburg Gel Fuel Fireplace. At a height of just over three feet, it comes in basic black. It will provide a great contrast when placed in a white-walled room.
Electric fireplaces are a great alternative for those who just don't have the time or energy to keep replacing wood. While the popular consensus is that anything electric just cannot have aesthetic appeal, nothing could be farther from the truth. The Del Norte Carved Ivory Electric Fireplace is white with an elegant carved design in the top that only adds to its nostalgic presence. Homeowners will truly feel like they've traveled back in time with this fireplace decor. For those who are more into contemporary style, Fayette Convertible Media Ivory Electric Fireplace would be an excellent choice because of its practical and aesthetic aspects. The fireplace offers a sleek, white modern design with compartments on each side that are ideal for holding a variety of electronic media tools.
Whether electric or fuel-driven, fireplaces can offer more than just heat during cold nights. They can add decor and style to any living space, allowing homeowners to express their creative side and bringing families together at the same time.

Saturday, August 23, 2014

How Often Should I Replace My Blinds?

Blinds can last a few years if they are treated correctly and maintained properly, so it's important to understand the way to maintain the blinds when asking "How often should I replace my blinds?" They should be cleaned periodically to keep them in the best condition possible, and minor repairs should be done promptly.

Cleaning Blinds
If the blinds are metal or plastic, remove them from the window and take them outside or into the tub. Use a bucket of warm water, a drop of dish detergent and a soft scrub brush to gently brush dirt from the blinds. Lay the blinds out to dry before hanging them back on the windows. This should be done approximately once a month to keep them in new condition.

For fabric or wood blinds, don't soak them with water. Use a vacuum to remove dust and dirt from the fabric. A dry sponge is a great way to clean the blinds too. If they become extremely dirty, fabric blinds should be cleaned by a professional dry cleaning service. Spots can be removed by using a damp sponge that has an all-purpose cleaner on it. Cleaner shouldn't be sprayed directly on a stain.

Replacing Blinds
Even blinds that are cleaned regularly will need to be replaced eventually. If the home is being upgraded, new blinds are the perfect way to bring new life to the home. Any time the blinds are broken, they should be replaced. Age and wear can slowly break down the integrity of the slats, strings and construction.

As long as there are no repair problems with the blinds, they can last for years as long as they are properly cared for and maintained. That includes regular cleaning and replacing slats or string occasionally. If a slat breaks, it's definitely time to replace the blind.

Thursday, August 21, 2014

How Are Mirrors Made?

Hundreds of years ago mirrors were reserved for the wealthy. Sheets of metals such as copper, silver, bronze and even gold were polished to a shine. Glass was also used but mirrors made from polished metal were preferred .

How are Mirrors Made Today?

There are primarily two components to commercially made mirrors: polished glass and a metallic coating, usually aluminum.

The process begins with cutting the polished glass. A saw is used in this part of the process. The saw contains diamond dust that is embedded in the blade and can cut through the glass easily.

The glass is then placed in a vacuum sealed chamber and coils of aluminum are placed behind the glass. All air is removed and the chamber is brought to an extremely high temperature. Once the ideal temperature is reached, fusion takes place between the glass and the aluminum, This process creates a reflective surface on the back of the glass. A protective paint is then applied over the aluminum to prevent oxidation.

Mirrors made for special purposes, such as telescopes, are manufactured using slightly different techniques, but the general principles are the same.

It is possible, and fairly easy, to make your own mirror using some basic materials. There are actually a few methods of making your own mirror, but there is one process that is very easy.

How Are Mirrors Made at Home?

In order to make your own mirror, only a few items are needed.

A piece of glass
Metallic silver spray paint
Paint sealer


Start out with a piece of clean glass.

Place the glass on a protected surface, either an old towel or newspaper.

Spray paint the back of the glass following directions on the spray can. Cover the back of the glass using sweeping motions. Repeat with additional coats as needed, let dry between coats.

To protect mirror from scratches, apply a coat of sealer over the dry silver paint.

Whether the mirror is purchased from a store or homemade, everyone can afford to have a mirror in their home.

Tuesday, August 19, 2014

How Can I Attract Birds to My Birdhouse?

Many people love watching nesting birds, but birds can be choosy about where they call home. If you've put up a box but your yard is still lacking feathery guests, you might be wondering, how can I attract birds to my birdhouse?

Make sure you have the right type of birdhouse.

Do some research on your local bird species to see what kind of house they require. For instance, martins live in groups with their own kind, and will prefer a birdhouse with several separate compartments. Bluebirds and wrens are more solitary, and will make use of a single-room birdhouse. The house's entrance should be big enough for the bird to pass through easily, but small enough to dissuade potential predators.

Collect nesting material.

Do you have a craft box full of yarn or fabric scraps? Is your pet shedding tufts of fur? Did you just give your kids a haircut? Birds will love using these to line their nests. Try hanging a bag full of soft nesting materials from your birdhouse to see if it tempts them.

Create a food source.

Feeders and wild birdseed are readily available in most home improvement and even grocery stores. Alternately, you can do some research to see what local bird species prefer to feed on, and then plant those trees or shrubs. Place the food within sight distance of your birdhouse, but not too close. The flurry of activity around the feeder might discourage cautious parents from using your nest box.

Provide a drinking and bathing area.

Birds will seek out homes near a source of fresh water. To make your yard a more attractive nesting area, consider adding a birdbath, a small pond, or even a fountain. Birds love the sound of running water as much as people do!

Don't mow too frequently.

Your lawn doesn't need to turn into a jungle, but if you mow every weekend, try switching to every other weekend. Mowing reduces the number of insects many birds feed on, and the taller grass will provide more cover from predators while foraging.

Sunday, August 17, 2014

History of Weathervanes

The humble weathervane, symbol of rooftops everywhere, has a convoluted history. While you might think this tradition was established by farmers looking to watch the winds, the original use of the weathervane actually dates back almost a thousand years!

The original structure of what we now know as a "weather vane" comes from the Old English fana, or "flag." The practice of measuring the winds using this device originally came from the Catholic Church in pre-9th century Europe. No one is sure who first began using the "rooster" design, but it caught on quickly: by the 10th century, a decree had been issued by the Church that every weathervane on every church building must be fashioned in the shape of a rooster.

The reason for this design is still unclear today. Some scholars claim that the rooster symbolizes the weather, but it is more likely that this was a symbol designed to remind worshippers of the betrayals of St. Peter. As the Bible story goes, Peter was prophesied to betray him by the third crow of the cock on the day of Jesus' crucifixion. As the tale goes, Jesus was right: by the third crow, Peter had disavowed Christ three times already. Establishing this symbol across Church rooftops was a powerful measure for reminding churchgoers to be faithful to Christ, and not betray him as Peter did.

The history of weathervanes is further complicated by the existence of other types of weathervanes previous to the Church standard. In particular the great Roman agora in Athens held a famous bronze weathervane shaped like a mer-man, or Triton. However, this building was intended as a demonstration of the sciences of the time, with other devices including a water-clock inside, so it may have been a decorative rather than a practical weathervane.

While weathervanes are a reliable form of measuring wind direction, they are best when coupled with other technologies, such as anomemeter or other wind-measuring device. On their own, of course, weathervanes are a time-tested and traditional weather analysis technique as well as an excellent ornamental decoration.

Friday, August 15, 2014

How To Replace A Broken Stair Baluster

Broken stair balusters look shabby and pose a safety danger. Both children and adults can become trapped in the open space; splinters, cuts and impalement can result from broken pieces of wood. Replacing a broken baluster is not a difficult task for a person with moderate woodworking skills.

If the baluster can be repaired, perform these adjustments and allow the work to dry completely before attempting to replace it. Construction adhesive, finishing nails or screws, wood filler or other items can be used to restore the baluster’s functionality.

If it cannot be repaired, remove the broken baluster and take it to the lumber yard to find a replacement or find an matching baluster online. Do not worry about lengths. If it is broken in pieces, remove a nearby baluster for this purpose. If no suitable replacement can be found, contact master woodworkers to commission a custom made replacement. This is often the case with vintage and antique balusters. Be sure to use the same wood species as the rest of the existing balusters for continuity.

Once the new baluster is acquired, prepare the stair and rail to receive it. Remove all putty, paint, nails and other debris. Measure the distance from the stair to the handrail and mark the baluster. Use a T bevel to acquire the angle at the top and carefully transfer the marks to the top of the baluster. Cut the angle and install the baluster in place, bottom first. Sand and stain or prime and paint to match the surrounding wood. The baluster can also be sanded and primed before installation.

Wednesday, August 13, 2014

Which Wood Colors Are Dark?

When it comes to decorating, dark wood colors can led a room a sophistication and gravitas that blond woods might not. Dark woods call to mind libraries in men's clubs or Downton Abbeyesque drawing rooms. Fortunately, dark wood furnishings can be perfectly affordable for ordinary folks! Here are some naturally dark woods:

Queensland Walnut
This tree is native to Australia and can be dark, rich brown streaked with pink, gray green or black stripes. It has an interlocked, irregular or wavy grain. The wood is used for high end furniture.

Brazilian Rosewood
The color of this wood ranges from a rich violet-brown to violet streaked with golden brown or black. Most rosewood has a straight grain though wavy examples can be found. It has a coarse texture and a gritty, oily feel. Brazilian rosewood is prized for solid wood construction as well as veneer.

African Mahogany
This wood is found in West, Central and Eat Africa. The heartwood can be deep, reddish brown and the grain can be straight or interlocked. African mahogany is used for furniture and cabinetmaking and for the interior trim of boats and cars.

African Ebony
This wood comes from southern Nigeria, Cameroon and Ghana and can be gray to black with black stripes or solid black. It has a fine texture and a slightly interlocked or straight grain. Ebony is used in tool making and for piano and organ keys.

Snakewood
This beautiful wood from central South America has blotches, spots and speckles that remind one of a snake's skin. The ground color is usually deep reddish brown with black speckles or black stripes. It's a hard and heavy wood that's used to make fishing rod butts, drumsticks, handles, violin bows and bric-a-brac.

Wenge
This dense West African wood has a dark brown heartwood with very fine black veins. The grain is straight, and the wood has a coarse texture. Wenge is excellent for hardwood flooring.

African Blackwood
This wood from East Africa is a dark purple brown color with black streaks. The grain is usually straight, and the wood has a very fine and slightly oily feel. African Blackwood is extremely hard and heavy and used for musical instruments.

Monday, August 11, 2014

What Are The Most Popular Colors For Shutters?

Shutters are a wonderful addition to a home. Besides looking smart and attractive, shutters that actually close in frigid temperatures are a very practical way of keeping the home warm. As a decoration only, they add a tailored, finished look to the design of a home. They are usually placed on the home's exterior, though some are designed to enhance the interior windows.

Shutters are available in many different styles and colors today to complement the exterior decor of the home, but the most popular colors for shutters are black and brown. There are some very good reasons for this. For one thing, dark colors are often used as a bold accent color in design. An accent color gives the entire look of a design a certain punch of color that excites the heart and draws the eye toward a focal point of attention. For this reason, black is most often used as an accent color for exterior shutters.

Dark brown is a popular favorite, too, for a slightly different reason. Brown tends to wear well and look attractive year after year with little maintenance.

You don't have to be tied down to current trends in the most popular colors for shutters, but you do need to take the colors of the rest of your home into account. The colors of a home can either interest people or distract them. They can increase a home's market value, or actually lower it, if they make the design of the home look distasteful or boring. Colors are more important than we realize.

Overall, you should not use more than three colors for the outside of your home, excluding your accent color, or you will risk it looking too busy. The designing rule is that the accent color for shutters should be in the same color range as the others, but it should provide a contrast to the other colors in some way. This adds visual interest so that the house doesn't look drab and monotone.

Consider yourself the painter of a fine work of art when you look at your home. The design of your home distinctly expresses who you are to others. Let that expression be a good one.

Saturday, August 9, 2014

How to Choose Discount Corbels For Any Room

Corbels can add an unexpected decorative element to any type of room. They can also be used functionally to support a counter or a shelf. Corbels come in many shapes and sizes today. It is important to consider several things when choosing corbels.

Size

The first thing to look at is the size of the corbel. Size is very important especially if the corbel is being used to support weight. Decorative corbels should not be overly large. Large corbels can look awkward in a room. If the corbel is being used to hold a shelf, then it needs to be at least half the width of the shelf. Another general rule is to make sure around a half-inch of space is always left between the end of the corbel and the edge of the shelf or counter.

Solid Backing

Corbels designed to support weight are different from corbels designed to be decorative. The main difference is that a weight-bearing corbel will be made from solid wood or will have a solid block along the back. The block is what will actually be supporting and weight. Make certain to look for solid blocking or a solid wooden design when shopping for discount corbels to hold counters or shelves.

Design

Corbels come in many different styles today. Some are very minimalist and look appropriate in a modern setting. Others have intricate carvings along the surface that will match a more elaborate type of decor. Consider how the style of the corbel will mesh with the rest of the room. A poorly chosen corbel could create a confusing appearance. Consider the trim, flooring, furniture and colors in a room before making a choice.

Natural or Primed Surface

A final thing to look at when choosing discount corbels is the type of surface and material. Corbels can have a natural wood finish. They can be made from many types of wood from white oak to walnut. Corbels can also have a primed or paint-ready surface. These corbels are designed to be painted before being mounted on the wall. It is important to choose the right type of surface since it can be difficult to paint a corbel with a natural wood finish.

Wednesday, August 6, 2014

Polyurethane Ceiling Tiles

When building a new home or renovating a business, there are many choices for ceiling materials. Instead of boring plain ceiling tiles, drywall or plaster, polyurethane ceiling tiles make an excellent choice. These tiles offer visual interest, aesthetic appeal and add value to the structure. With so many styles of polyurethane tiles to choose from, there is no end to the combinations and patterns that can be created.

Installation of Polyurethane Tiles for Ceilings
Installation of polyurethane ceiling tiles is a relatively simple process. Wood furring strips are nailed to the ceiling and then the polyurethane tiles are nailed to the wood furring strips. This allows for easy and seamless installation with perfectly matched corners and lines. Installation of ceiling tiles is an easy way to cover up an uneven, bumpy or stained ceiling.

Care of Polyurethane Tiles
One of the many benefits of polyurethane tiles for ceilings is that they are easy to care for. A feather duster or a soft microfiber cloth are all that are needed to keep the tiles looking as good as they did the day they were installed. Clean the tiles once a month to keep them looking great and to enhance the indoor air quality of the home or building.

Styles of Polyurethane Tiles for Ceilings
Polyurethane tiles for ceilings come in a wide variety of styles. For a traditional look, select the egg and dart pattern or the star ceiling tile. In office buildings, lobbies or elegant foyer areas, the Edwards ceiling tile or Kinsley ceiling tiles are excellent choices. For a more relaxed look, the Ashford ceiling tile is a wise choice. All of the ceiling tiles measure 24" by 24" with the exception of the Ashford ceiling tile, which measures 28.75" by 28.75". Since the tiles are perfectly square, they can easily be cut to fit any shape or size of ceiling.